Welcome to the comprehensive documentation for our AI Blog Post Generator plugin. Here, you will find detailed instructions and information on how to install, configure, and utilize the various features of the plugin. We strive to make your experience seamless and hassle-free as you generate captivating blog posts effortlessly. If you encounter any questions or need assistance along the way, our dedicated support team is always ready to help. Feel free to reach out to us for prompt and friendly support.
Installation
Step 1 – Download the AI Blog Post Generator Plugin
While we aim to add the AI Blog Post Generator Plugin to the WordPress Plugin Repository, the submission and approval process is a lengthy one which we do not control the timeline of. For that reason, at least for now, you need to download the plugin from our website.
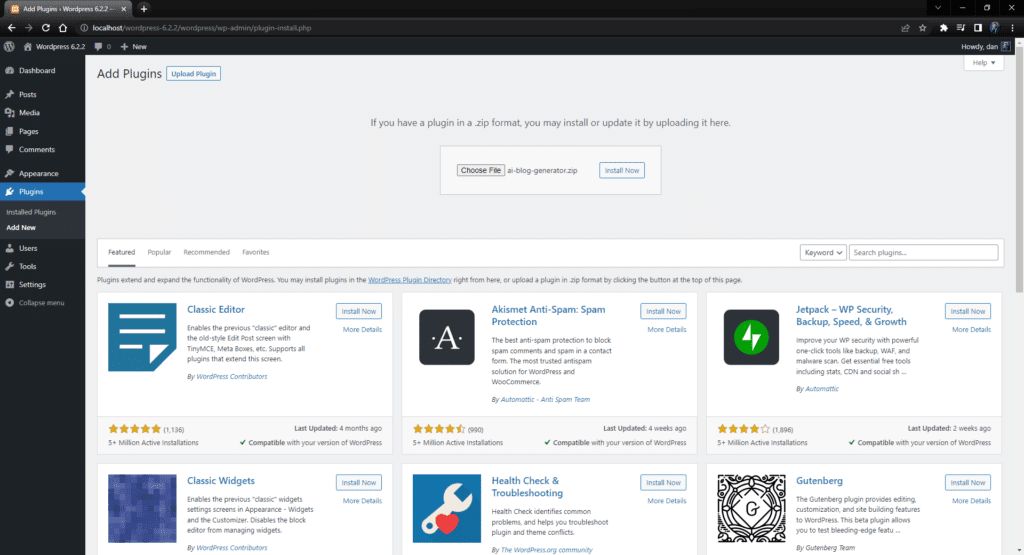
Step 2 – Navigate to the Plugins Page
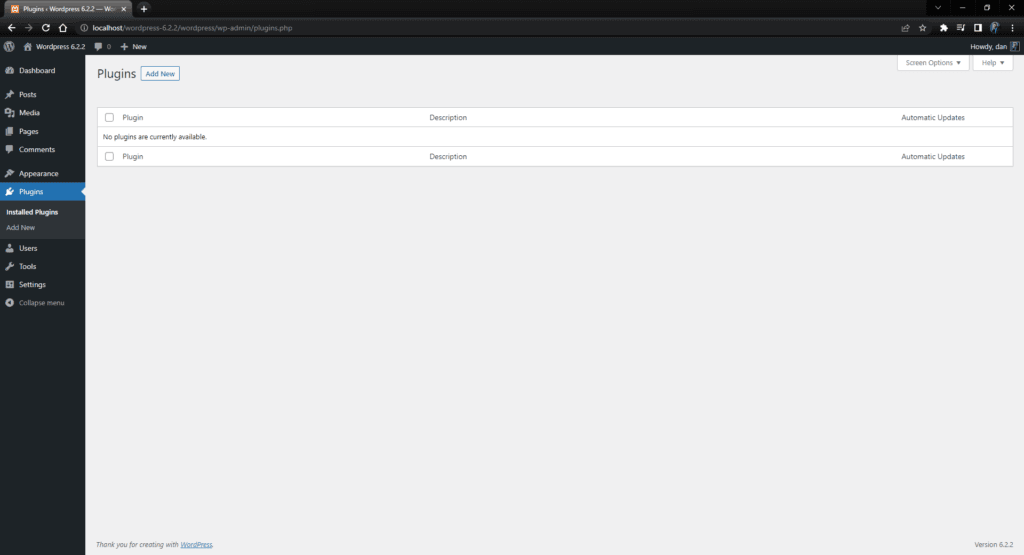
Step 3 – Click on Upload Plugin
There is a button at the top of this screen next to the page title “Add Plugins” which, when clicked will expand the form used to find and upload the plugin.
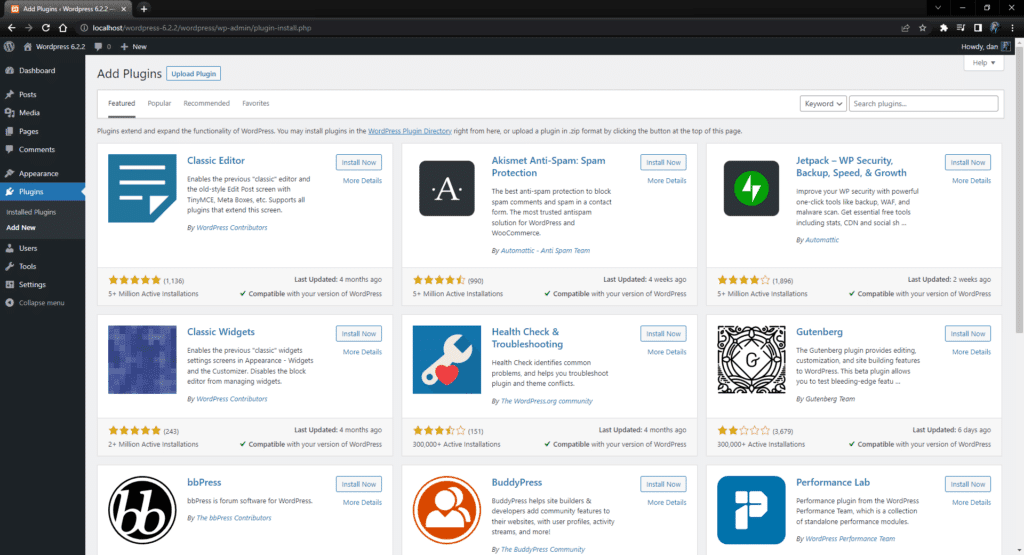
Step 4 – Upload New Plugin
With the upload form showing, you can now click on the “Choose File” button in to locate and select the plugin.
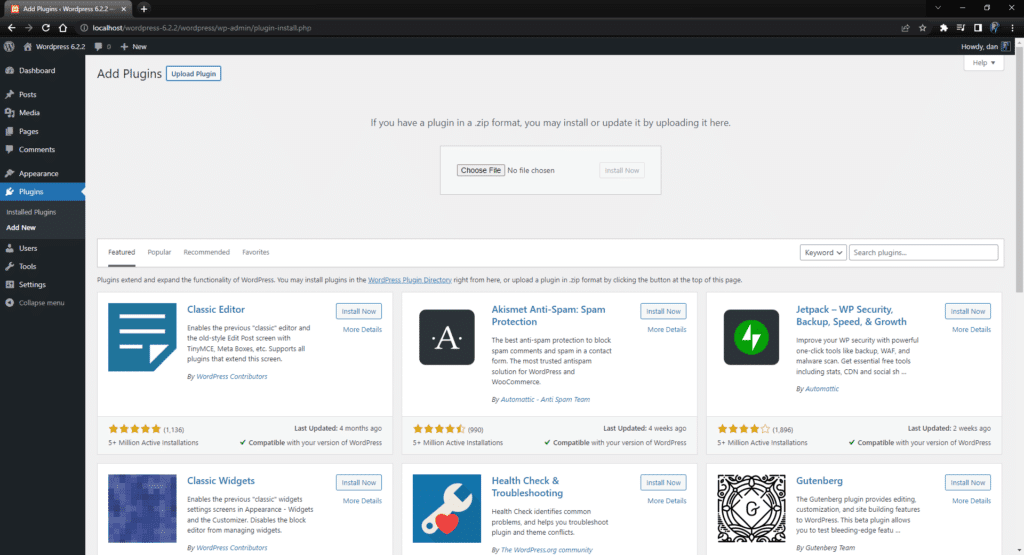
Step 5 – Choose the AI Blog Post Generator Plugin
Once you’ve found and selected the plugin, click on “Open” to add the file in the upload form.
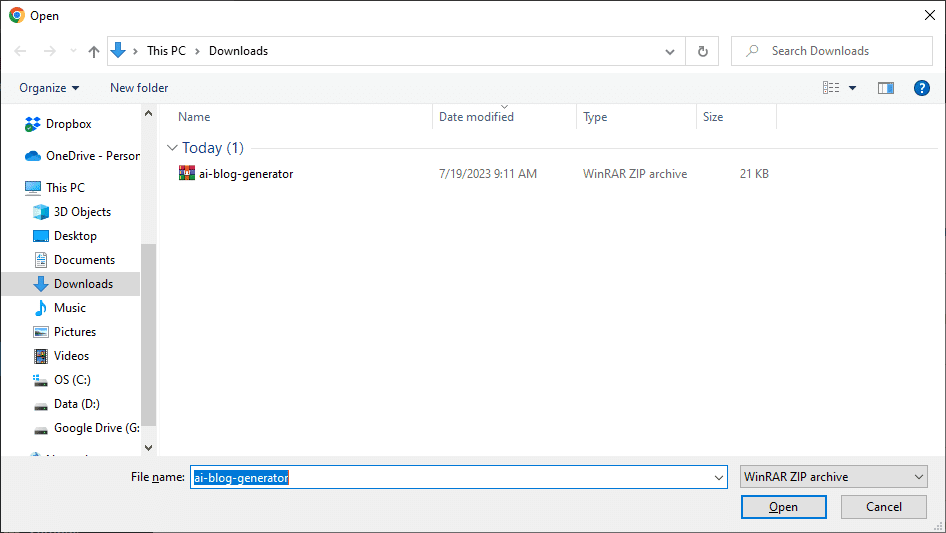
Step 6 – Install Plugin
Verify that the correct filename shows in the form and click on the “Install Now” button.
Step 7 – Activate Plugin
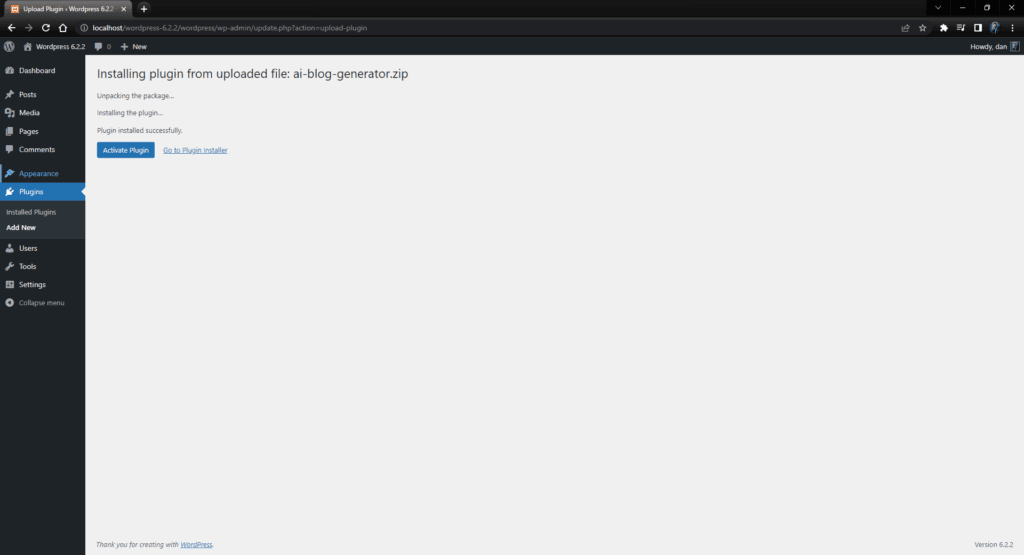
Once the plugin finishes uploading and installing, you will see a page that prompts you to click on the “Activate Plugin” button.
Step 8 – Plugin Activated!
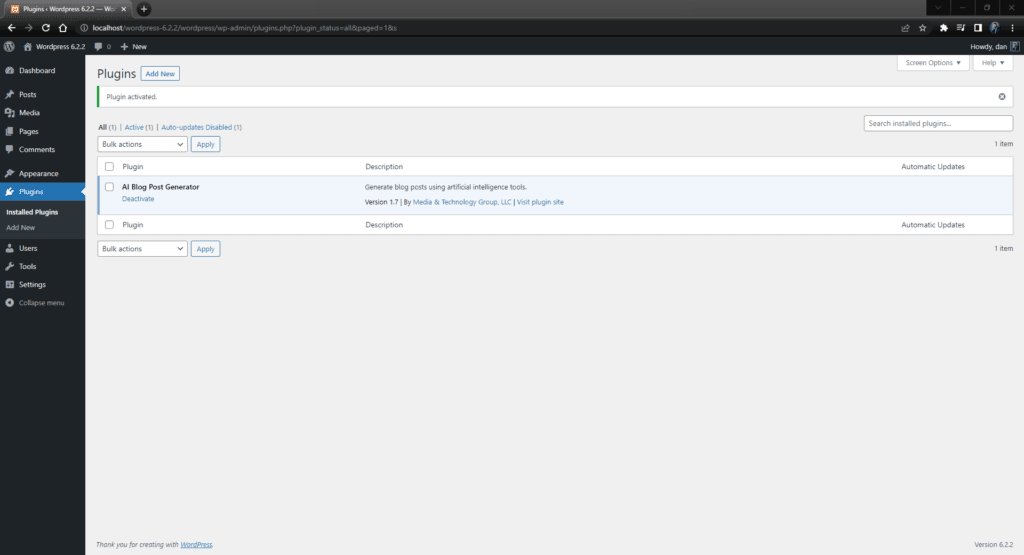
Now that the plugin is installed and activated, you will see it in the list of plugins, ready to use!
Configuration
There are two new screens you will need to become familiar with that come with this plugin: the AI Generator Settings page which can be found under the Settings links while in the WordPress Dashboard, and the AI Generator page found under the Posts links while in the WordPress Dashboard. We’ll start with the Settings.
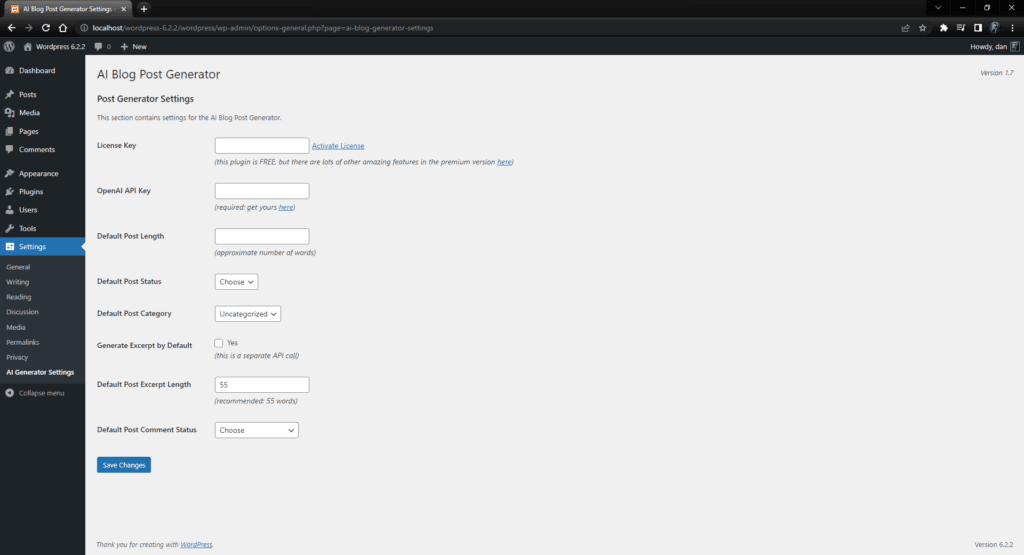
While the settings you see on this page may update over time as new features, performance improvements, etc are added to the plugin (and we’ll do our best to maintain the documentation promptly as new updates are made), the location for the plugin settings will remain the same.
License Key
We have both a free and a premium version of the AI Blog Post Generator Plugin. If you only plan to use the features that are available in the free version, just leave this field blank!
If you would like to upgrade the plugin by purchasing a license, please visit our product page.
Once you have purchased a license, you will be given a key which should be in the format of:
MTG-xxxxx-xxxxx-AIBPG
Place this key in the “License Key” field on the settings page

Once active, you will notice that the “Activate License” link goes away and shows that you have a “Valid License!” If needed, you can also click on the “Deactivate License” link (such as if you wanted to use the premium plugin on another site without getting a new license).

OpenAI Key
In the current version of the plugin, both free and premium, OpenAI is the model that is available for generating blog posts. Without an API Key for OpenAI, the plugin will not be able to generate any blog posts for you, so for that reason it is required.
To get an API Key for OpenAI, first you need to create an account:
- Visit https://openai.com/ and sign up for an account.
- Verify your email address to complete account registration.
- Complete your profile (as of 2023-07-19 requires First Name, Last Name, and Birthday fields).
- Verify your phone number (must be a number that is not associated with any other account and can not be a virtual number).
Once your account is fully-established, you can get your API Key:
Click on API.

Click on “View API keys” in the menu that displays when you click in the top-right corner.

On this page, you will click on the button “+ Create new secret key” and give the key a unique name (not required, but helpful to know where you are using the key at).
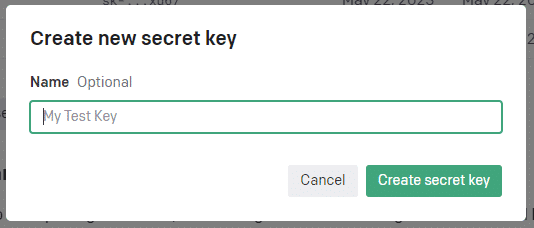
Press the “Create secret key” button.
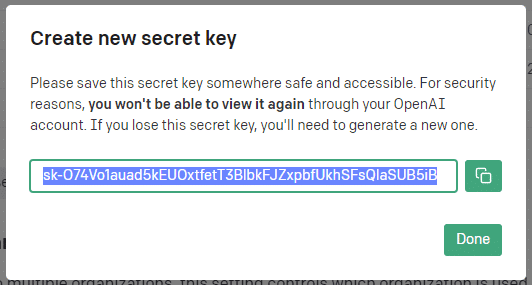
Once you’ve given it a name and then you will be greeted with a message and your newly created key:
Please save this secret key somewhere safe and accessible. For security reasons, you won’t be able to view it again through your OpenAI account. If you lose this secret key, you’ll need to generate a new one.
Now is the time you’ll want to copy the key from this page, then paste in the Settings field for the AI Blog Post Generator plugin.

Default Settings
There are a series of options where you can set defaults for when a new blog post is being generated. All of these Default Settings can be overridden when generating a new post, on a per-post basis.
Default Post Length
The default post length, accepts only a number which represents the approximate amount of words to write. If no option is set, blog posts will be generated with approximately 400 words.

Deafult Post Status
The deafult post status, options include: Draft or Publish. If no option is selected, blog posts will be generated in Draft status.

Default Post Category
The deafult post category, options are based on all of the post category you have created. If no option is selected, blog posts will be generated using Uncategorized as the category.

Generate Excerpt by Default
Generate post excerpt by default, options include: Yes (or not ‘Yes’ if unchecked). If no option is selected, blog posts will be generated without an excerpt since it uses a second API call.

Default Post Excerpt Length
The deafult post excerpt length, accepts only a number which represents the approximate amount of words to write. If no option is set, blog post excerpts will be generated with approximately, but no more than, 55 words.

Default Comment Status
The deafult post comment status, options include: Allow Comments or Disallow Comments. If no option is selected, blog posts will be generated with comments closed.

Default Post Language
The deafult post language, options include: English, Spanish, French, German, Italian, Portugese, Russian, Japanese, Chinese, Arabic. If no option is selected, blog posts will be generated in English.

Advanced Settings
Coming soon.
Using the Generator
Generate post titles effortlessly
Coming soon.
Create engaging and well-structured post bodies
Coming soon.
Easily add relevant tags to improve search engine optimization
Coming soon.
Assign posts to specific categories for better organization
Coming soon.
Automatically generate post excerpts for quick previews
Coming soon.
Enable or disable comments as needed
Coming soon.
Define your voice, audience, and tone for your posts
Coming soon.
Quickly configure default settings and override on per-post basis
Coming soon.
Automatic Plugin Updates for bug fixes and feature upgrades
Coming soon.

